
Creating a personalised calendar with your photos is both fun and easy! In this #smartphotodiy video, we show you how incredibly easily and quickly one can be created as well as all the possibilities available with Smartphoto’s photo calendars. For example, did you know that you can add your own events, such as birthdays and other important dates, that are then printed on your calendar? In addition, your events will be saved at your Smartphoto account for the following year. Watch our #smartphotodiy video below or follow our simple step-by-step guide on how to create your own photo calendar!
Whether it’s the first time you’ve created a personal calendar from your photos or if you’re already a dab hand, this post will definitely give you useful tips you need to quickly and easily create a photo calendar.
At Smartphoto you will find several types of personal calendars, from traditional wall calendars to diaries and year at a glance calender, but they can all be personalized in different ways and adapted to your specific wishes and needs. Below we list our favorites to help you along your way.
1. Choose the right calendar for your needs:
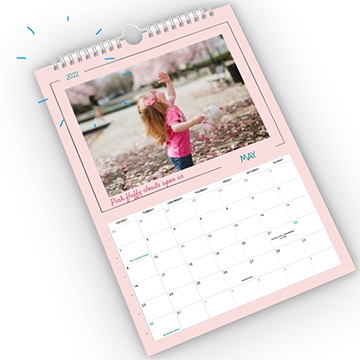
- A4 Wall Calendar – the calendar shown in the movie
- A3 Wall calendar – a bigger variant for those who want to enjoy lovely larger pictures
- Family planner – one column per family member – perfect for keeping track of everyday activities
- Desk Calendars – both a neat office detail and a handy helper
- Diaries – for those on the go who prefer a more traditional approach (there are many of us who do; it’s nothing to be ashamed of)
- Calendar – the year at a glance – gives you a quick overview of the year
You can find Smartphoto’s full range of photo calendars here. Once you find your favorite and decide on a design you like, the fun starts. Time to make the calendar yours!
2. Choose your starting month
Perhaps our favorite feature. Who says your year has to start with January? When you create personalised calendar at Smartphoto, you can choose the month your calendar starts with. We don’t judge anyone. 😉. In Smartphotos editor, select the menu option: “Select start month”, a dropdown menu opens, and you click the month you want your calendar to start with. It’s as simple as that!
3. A personalised calendar – change the design and color whenever you want!
You choose which design you want on your personal calendar as step 1, but who says you can’t change your mind! Certainly not us at Smartphoto, anyway. So, at any time while you are working on your calendar, you can switch to a different design. Go to the menu on the left and select “design” and all the design options will come up. Note: Keep in mind that your placed images may move, as the new design may not have the same choices when it comes to, for example, how many images you can have on each page. Therefore, always check your whole calendar if you change your design. Even in a design template, you can make your own adjustments. For example, you can have different background colors on different pages. You can find all background colors in the menu on the left under “background”.
4. Fill with your pictures + text

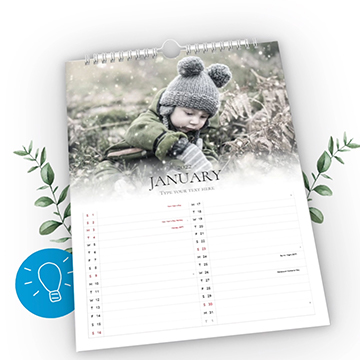
Now the fun begins! It’s time to fill your calendar with your favorite photos. For some designs, you can also add your own text/title to each month.
5. Select the number of images per page for your calendar
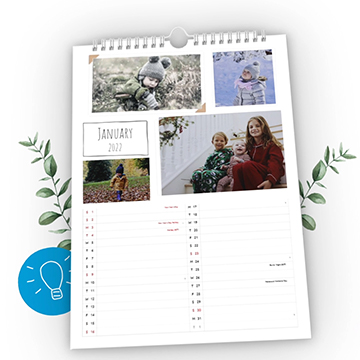
Your calendar doesn’t need to have one image per month. You can decide for yourself how many images you want to have on each page. You can do this in the menu on the left with the “layout” option. Then you’ll see all the available choices for the particular design you have chosen. Keep in mind that the layout options may differ between the different design types, and not all options are available for all designs.
6. Add important events to your calendar
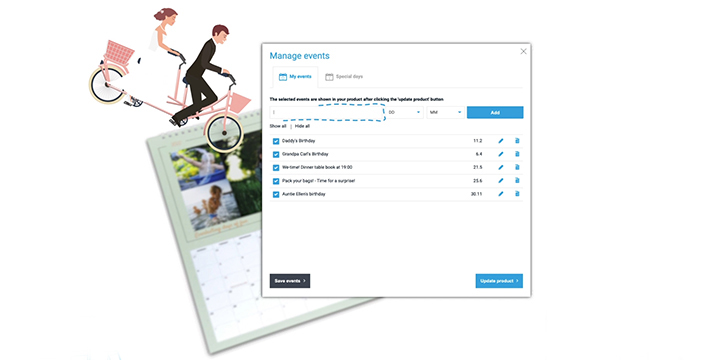
A great novelty in Smartphoto’s calendars is that you can add your own events that are then printed in your calendar. You can add your own list of important dates. To do this, press the yellow “events” button in the editor. Then, a new window opens like a pop-up, giving you a list where you can add and name your events. You also have the option to make the events active or inactive. For example, if you create multiple calendars and don’t want all the events in all of them, you can easily turn off selected events at the touch of a button. In this pop-up, you can also choose to disable holidays and flag days if you prefer a calendar without those days printed.
Good luck creating your personalised calendar!
Feel free to show us what you create!
Want to see more tips on fun and simple crafts? Please subscribe to our Youtube channel and of course subscribe to the blog.
We’d you to share what you’ve been doing with your photos. Feel free to tag us on instagram with @smartphoto.co.uk or use #mysmartphoto.
Good luck with your crafting!
See also:
DThe easy way to make a photo calendar – all the tips and tricks you need to know!