Table seating DIY video! Set a festive and personal atmosphere at the Christmas table by creating place cards, gift tags, and stickers with your photos. Here are three DIY tips on how to create a unique table setting easily and quickly. You can find many of the materials for this DIY project outdoors in nature, such as pine cones, foliage and twigs. .
Watch the full video to see how it’s done!
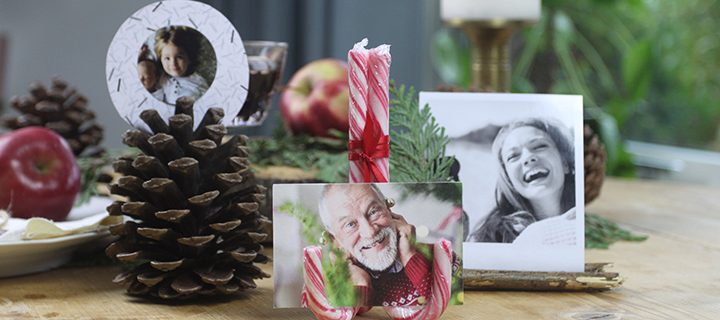
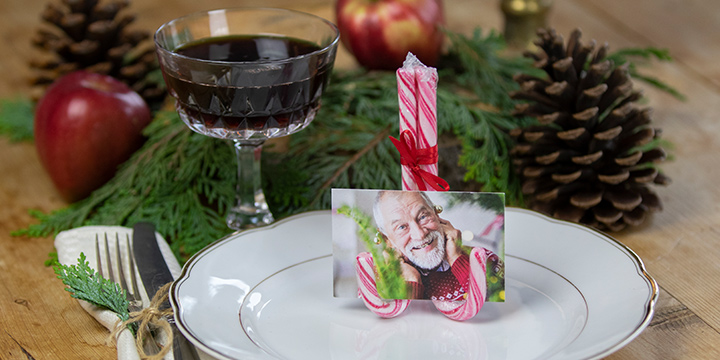
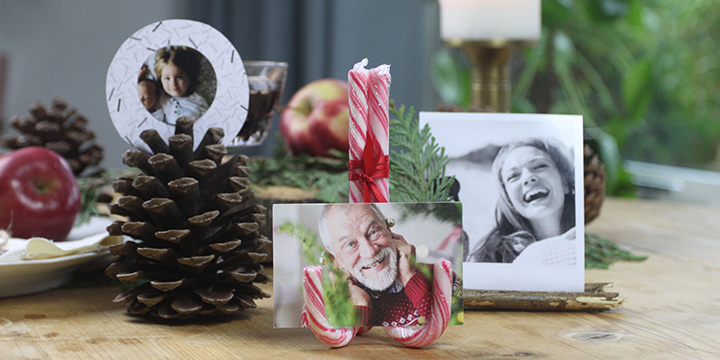
Tip 1: Candy canes and stylish place-cards!
What you need :
- Gift tags – (Click here to create your gift tags)
- 3 candy canes
- Red satin ribbon
This is a simple and super-sweet way to set a Christmas mood for your table that is personal and unique.
How to do it:
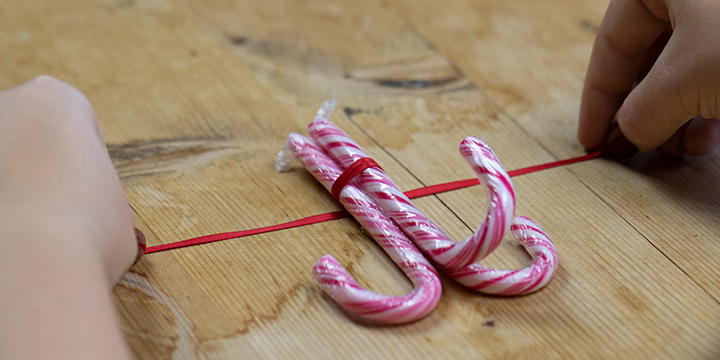
Start by tying three candy canes together with the ribbon. If you have trouble putting them together, a piece of double-sided tape can make it easier.
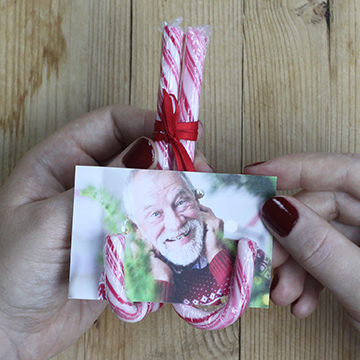
Position two of the candy canes with the bend towards you while the third acts as a rear support leg, allowing the placement card holder to stand upright on the table. Then, rest the placement card in the upturned handles of the two front canes. Your table seating plan is complete!
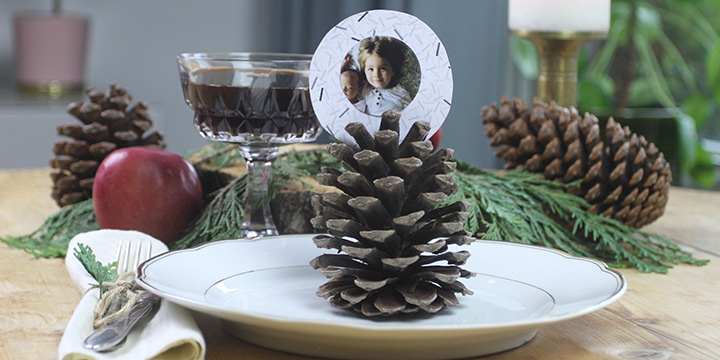
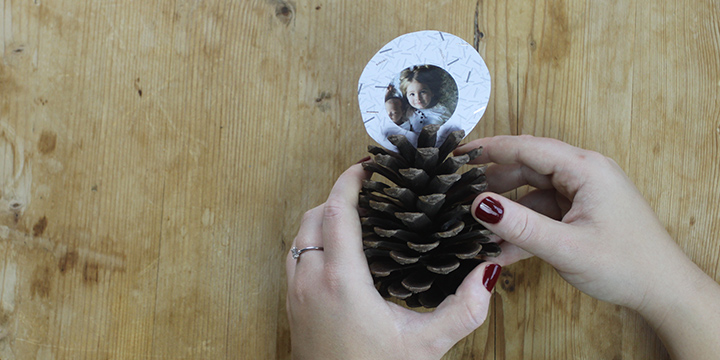
Tip 2: Pine cones and personalised gift tags
What you need :
- Round stickers – ( i.e. personalised gift tags)
- Thick patterned paper (any pattern is fine)
- A large pine cone
Christmas is a time when we let nature move in. Use seasonal foliage or twigs to decorate the Christmas table, and use pine cones as stylish holders for your placement cards!
How to do it:
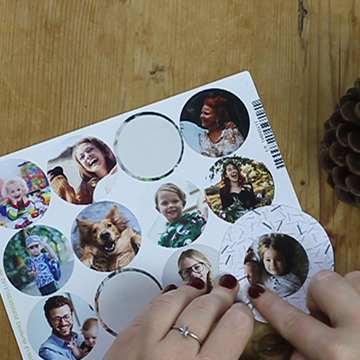
Cut a round circle of your patterned paper. The circle should be slightly larger than your sticker (gift tags are 4 x 4 cm in size). Then, paste your sticker in the middle of the paper. Next, secure the placement card between the scales of the cone. The cone is now a unique holder for your placement card.
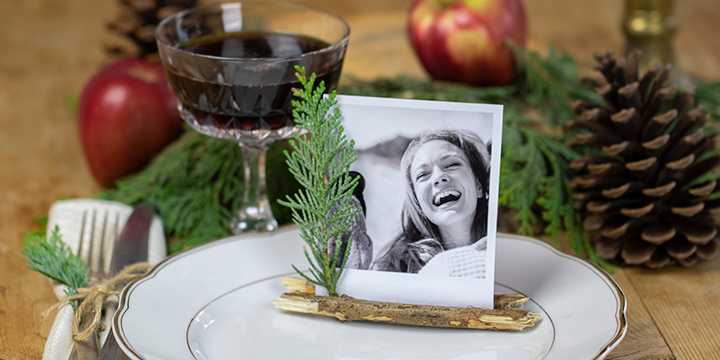
Tip 3: Twig place card holder and a black-and-white retro print
What you need:
- Black-and-white retro print (click here to develop yours)
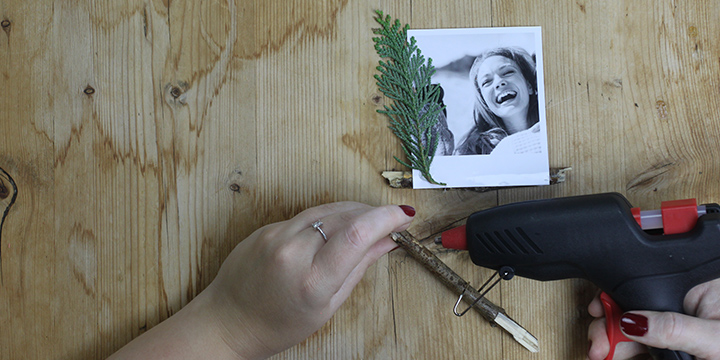
- Two twigs – preferably broken with neat ends!
- A small piece of foliage
- Glue gun
Black-and-white prints are incredible fun to craft with! Here’s a favourite that’s so beautiful in its simplicity – a table seating plan made with just sticks. It’s a real budget option as the parts can be found in nature and are completely free!
How to do it:
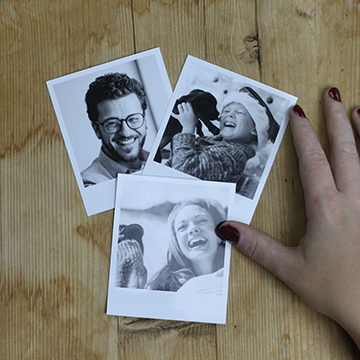
Start by developing black-and-white retro prints of everyone who will be at your Christmas table. To make your image black-and-white, upload it to smartphoto.co.uk and select “retro prints”. Then, click on the small pen icon in the upper corner. Under the “effect” menu you can then choose whether you want your image in colour, black-and-white, or sepia.
Then, take your glue gun and join the two twigs together. Remember that the small piece of foliage should be attached at the same time.
We hope you like our tips.
Feel free to share your place card ideas with us on @smartphoto.co.uk and #mysmartphoto.
Want more Christmas DIY tips with videos? Check out the tips “nice packages” and “advent calendar with photo“.
Another tip is to subscribe to our YouTube channel.
Good luck with your Christmas preparations!