Make an advent calendar with your own photos! A super-simple DIY hack on how to create and decorate your own calendar using your smartphoto images and photo products!
Count down to Christmas Eve by turning over a new photo every day! Each photo holds a wonderful memory and some uplifting words or maybe a family Christmas activity to do. Of course it’s you who decides what’s behind each door! What will you put behind door no.24?
Watch the video below and read our easy step-by-step guide to creating your own unique advent calendar!
What you need:
- Prints in a box – retro images with text – Order here
- 24 stickers – download our Christmas numbers design for free here
- An old picture frame ( find bargains at a charity shop)
- Twine
- 24 small clothes pegs
- Drawing pins (or a strong stapler).
What you do:
1. Decide how many images to fit in the width of your frame
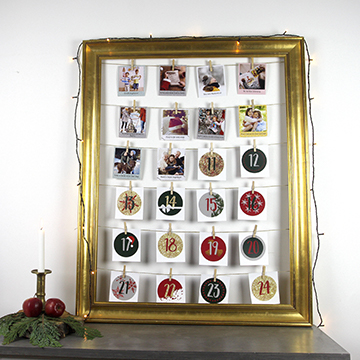
The first step is to calculate how many pictures you should have per line, which depends on the size of your frame. Prints-in-a-box images are 10.2 cm x 11.9 cm. The frame we used has inside dimensions of 67 cm x 88 cm, which allowed us to fit 4 images on each row with a total of 6 rows. .
Tip: We found a lovely frame at our local charity shop. This gives a rustic feel for very little money!
2. Use drawing pins to secure as many rows of twine as you needd
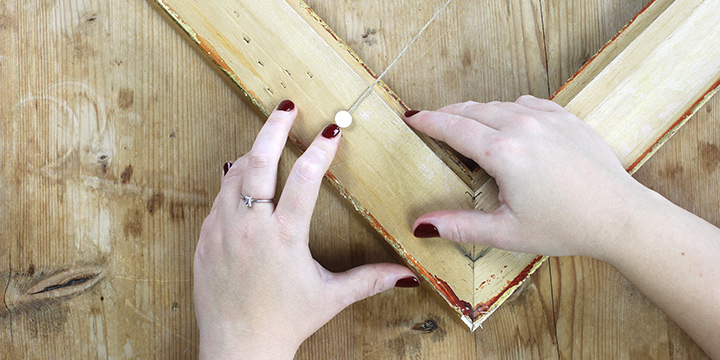
To get nice rows of “doors” on your advent calendar, flip your frame over. Then measure with a ruler or tape measure to work out the spacing between each string. Then, secure the twine rows with staples or drawing pins. .
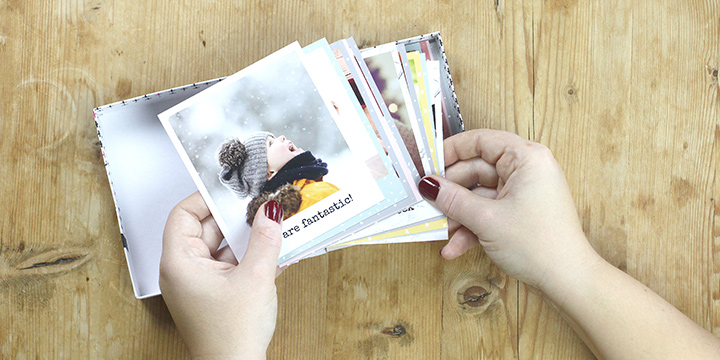
3. Place the pictures in the order you want
Before you attach your pictures to your advent calendar, you’ll need to make sure the final, fully “opened” calendar looks great and that any Christmas activities you’ve put in the text happen on the right days. The easiest way to do this is by placing your pictures face-up on a table and moving them around until you get the order you like. .
3. Flip the pictures over and attach your stickers

Now your pictures are in the right order, flip them over and put your 24 numbered stickers on the backs. We used 9-cm round stickers
Tip. Download our Christmassy numbers design for free here, then use it when ordering your stickers.
4. Hang your frame on the walll

Hang your frame on the wall or place it on a bench or table leaning against a wall.
Once your frame is in place it becomes much easier to finish your creation!
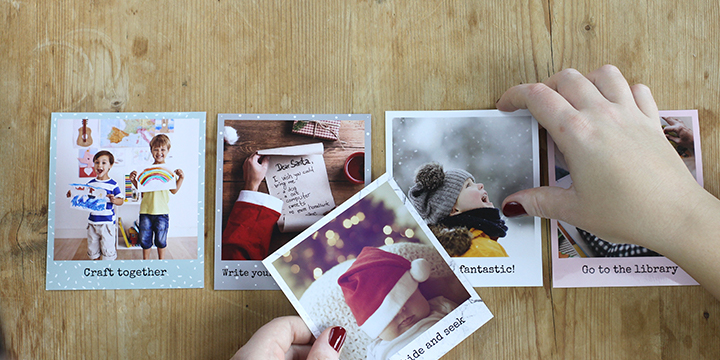
5. Attach your photos with clothes pegs
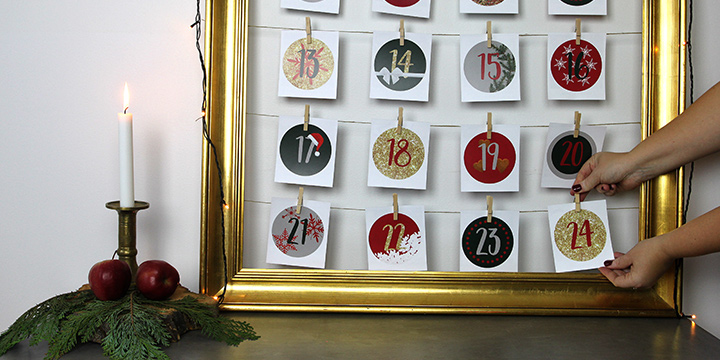
With the frame upright, you can now attach your 24 photos to the twines with the beautiful number stickers facing you.
6. Turn one picture over every day until Christmas!
Now for the fun part! Turn over one “door” a day until Christmas!
Tip: If you want to know more about how we created the products for our photo advent calendar, you can find a more detailed explanation on how to proceed below.
The products we used – Here’s how to order
Retro images
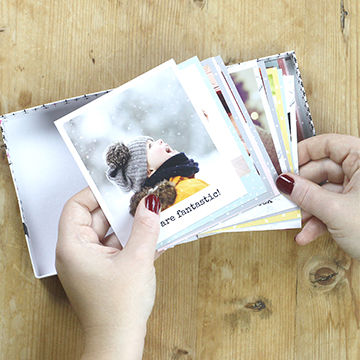
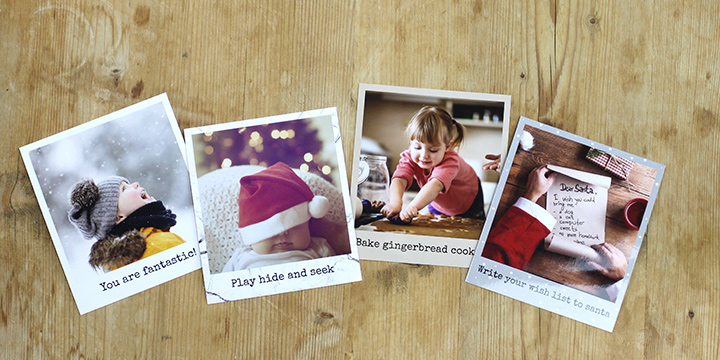
Start by ordering your pictures. We have chosen the product “pictures in box”. When you create your images, you can also add a unique caption to each image. This is where you write the various Christmas tasks (for you) or uplifting messages for the person who will receive your advent calendar. Pictures in box contains 36 pictures and costs £19.90.
Here’s how to create your pictures and stickers
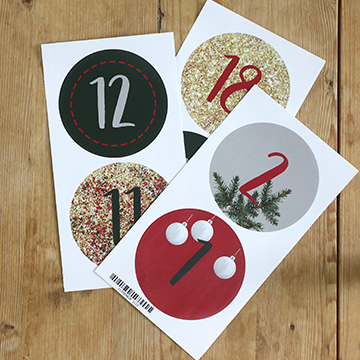
On the back of each photo we attached stylish stickers with the numbers 1 to 24 on them. Do you want to use the same design for the numbers as we did? Then download these completely free here. Our graphic artist Lisa created this design specifically for photo advent calendars. To get the numbers as stylish stickers, use the product food labels with photos. Round labels in size 9 x 9 cm. These labels come in packs of 8, so you’ll need a total of 3 packs.
Have fun creating your photo advent calendar!